This small module allows microcontrollers to connect to a Wi-Fi network and make simple TCP/IP connections using Hayes-style (AT) commands.
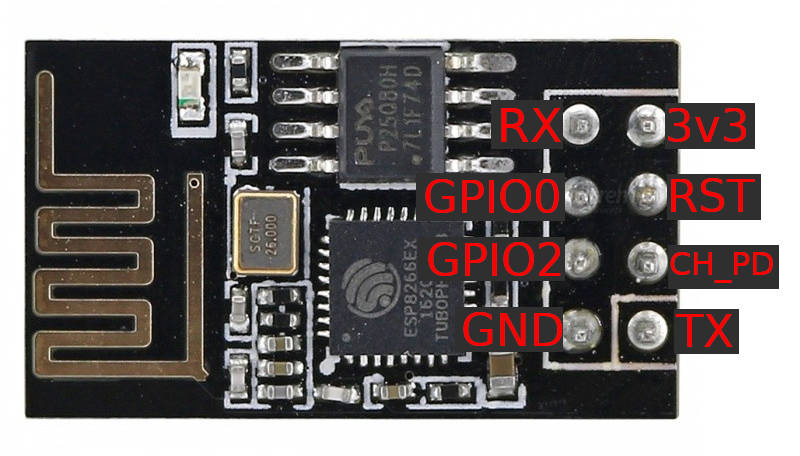
GPIO0 pin must be pulled to GND, and the GPIO2 pin must be pulled HIGH, to +3.3V, to enable bootloader mode. RST pin pulled GND to restart module.
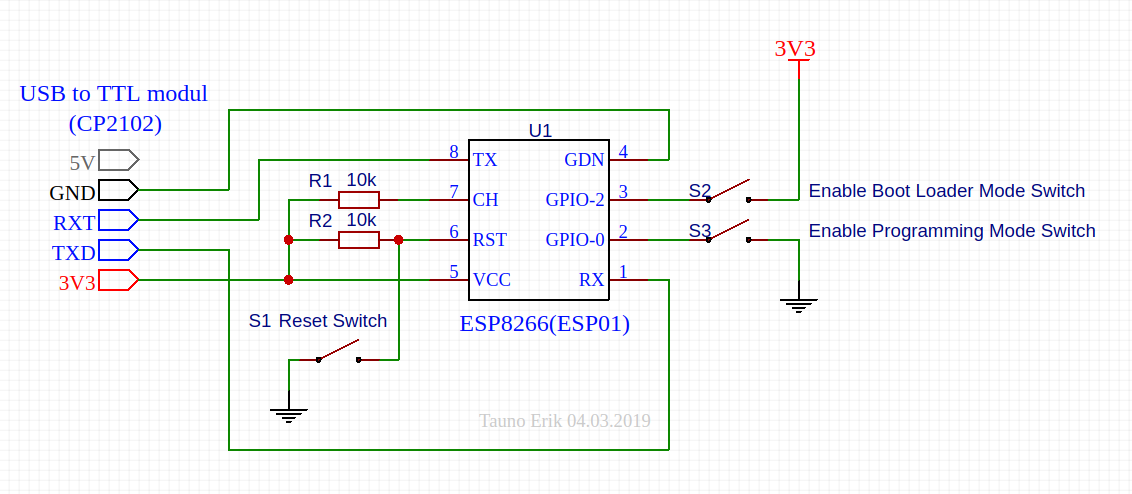
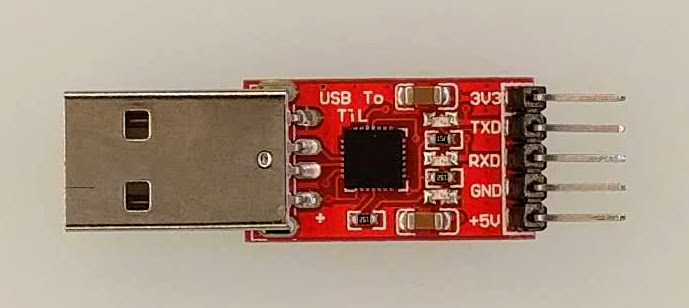
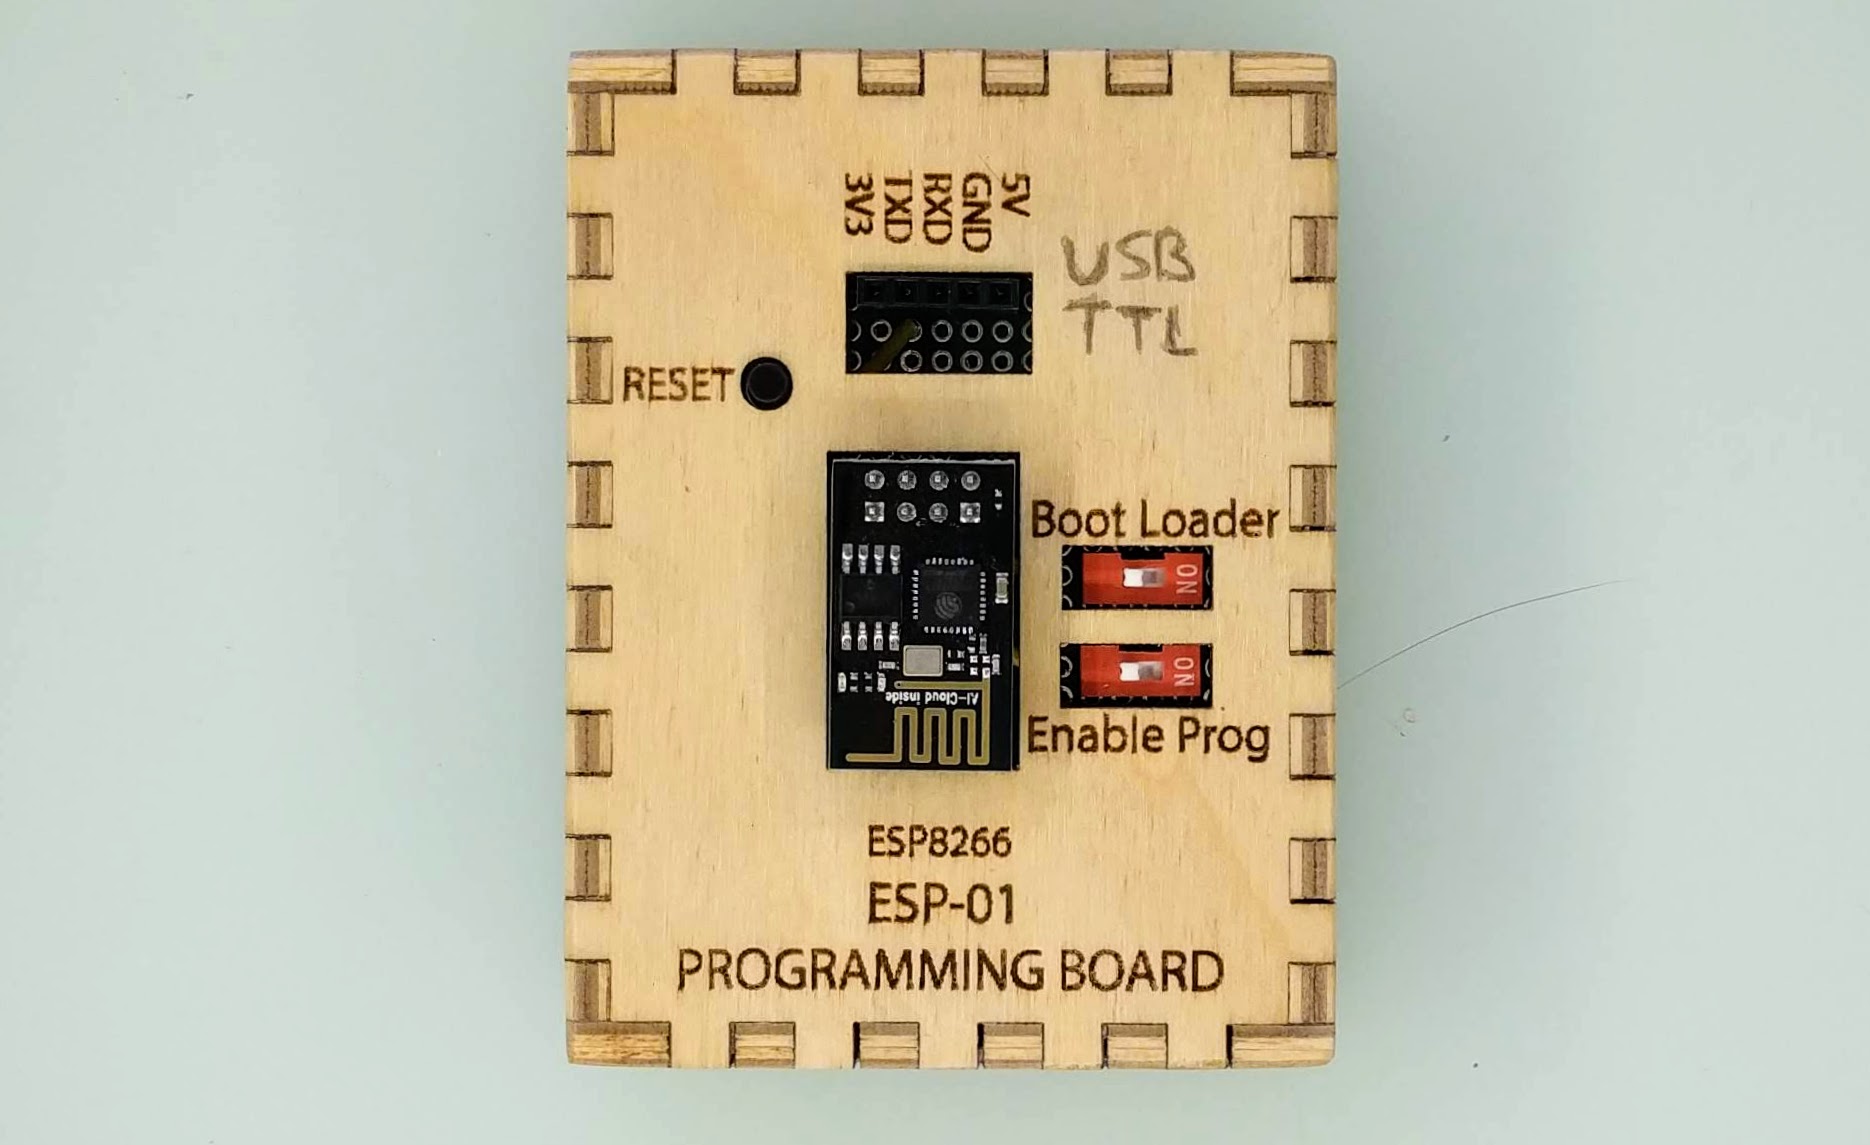
We use USB to TTL module to connect ESP-01 and computer
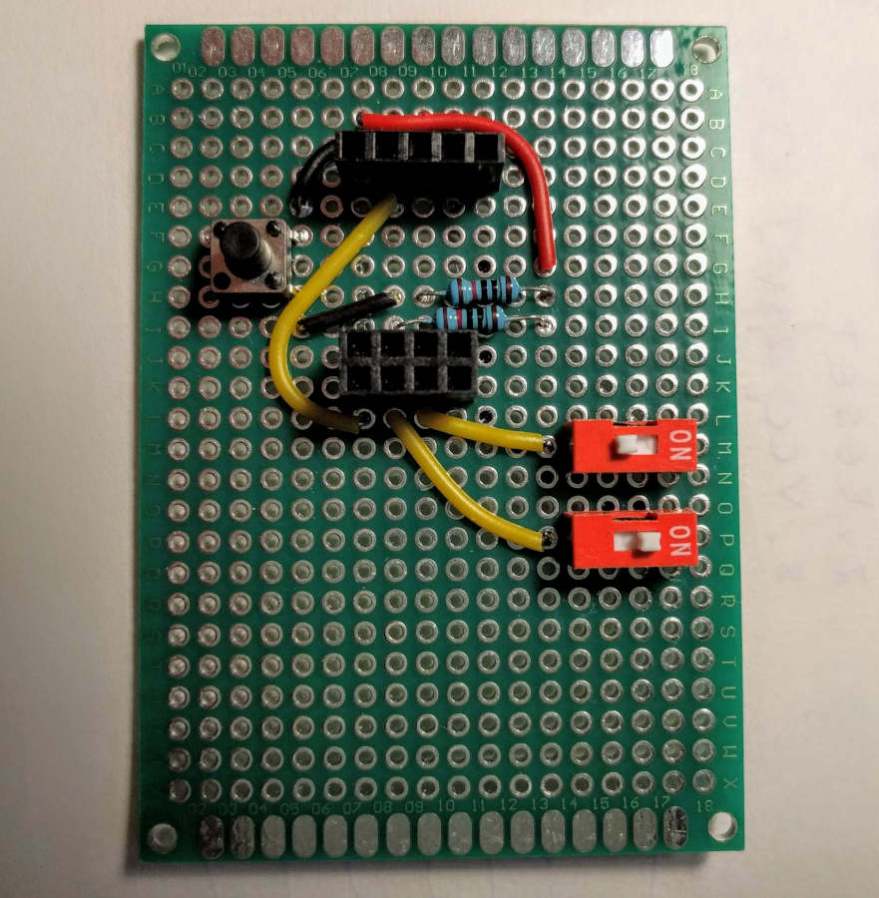
I made a simple case for the board:
Arduino notes
Arduino boards manager url:
http://arduino.esp8266.com/stable/package_esp8266com_index.jsonGPIO0 is LED 0
GPIO2 is LED 2
TX is LED 1 (Blue LED on board)
Updating ESP8266 firmware on linux
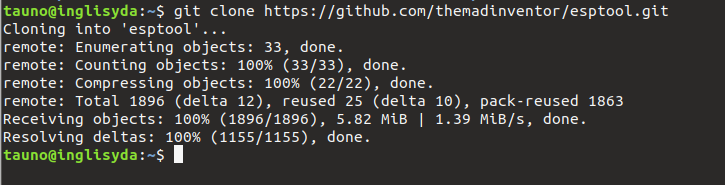
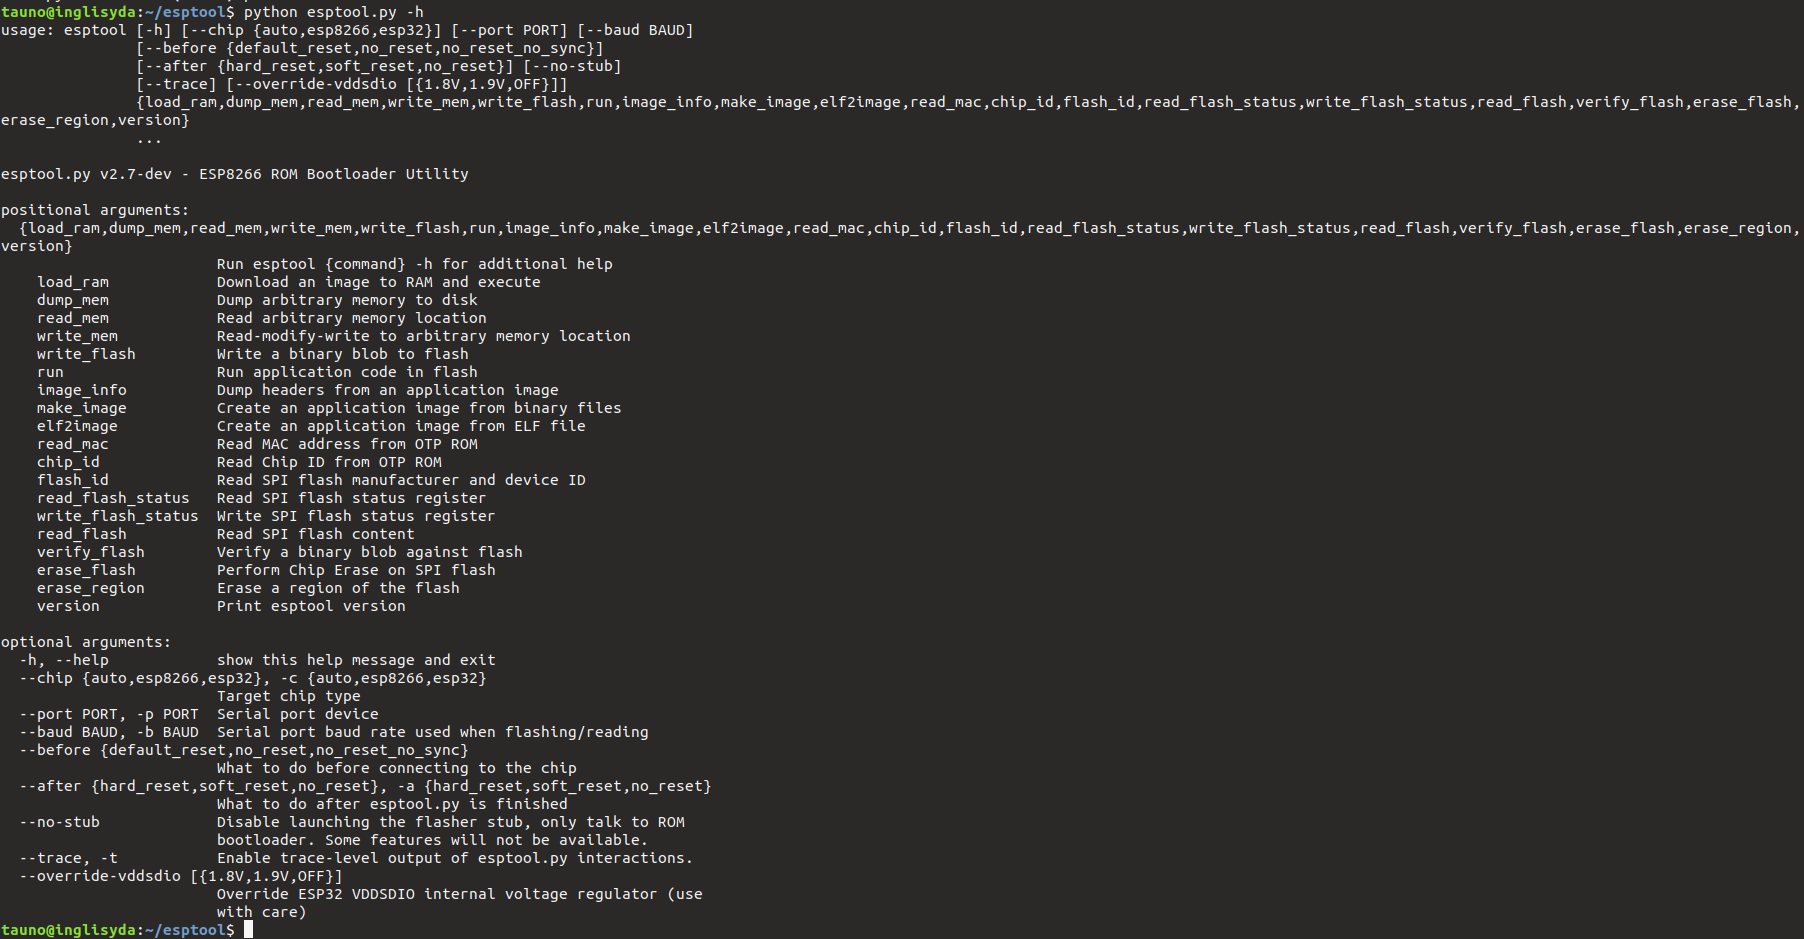
1. First we need a tool that can flash the firmware to the ESP8266: esptool. It can flash any firmware on the ESP8266, not only the official Espressif Systems one.
Esptool repository on github: https://github.com/espressif/esptool
git clone https://github.com/themadinventor/esptool.git
Let’s try whether it works:
cd esptool
python esptool.py -h

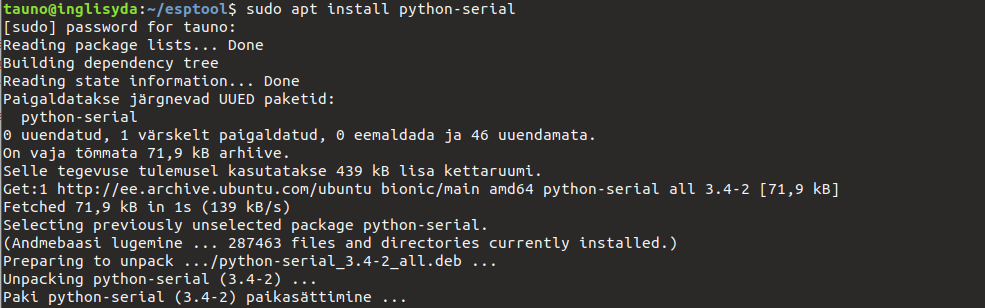
As it says, we need to install PySerial library.
sudo apt install python-serial
Now esptool works:
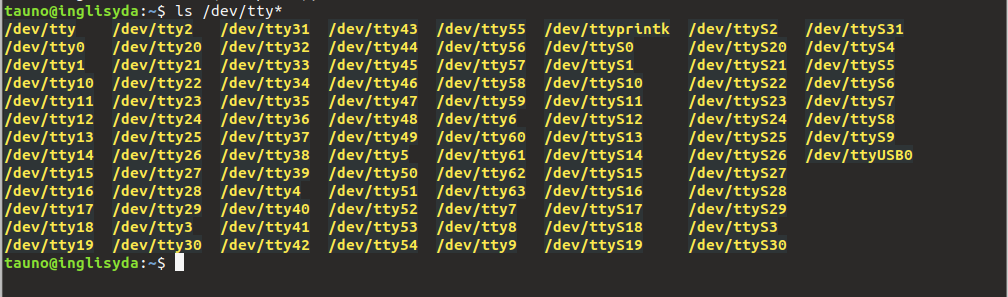
2. We need to find with serial port is connected to ESP8266. It is usually on linux something like /dev/ttyUSB0 or /dev/ttyUSB1 .The number can be different.
ls -l /dev/tty* | grep USB

With out ‘| grep USB’ is shows all available serial ports:
ls /dev/tty*
Another way to find serial port
ll -R /dev |grep "188, *0"

3. Download ESP8266 AT Bin V1.6.2 from:https://www.espressif.com/en/support/download/at?keys=&field_type_tid%5B%5D=14
Unzip it and move “ESP8266_AT_Bin_V1.6.2” to home directory or change the comant to ponit to your file locations.
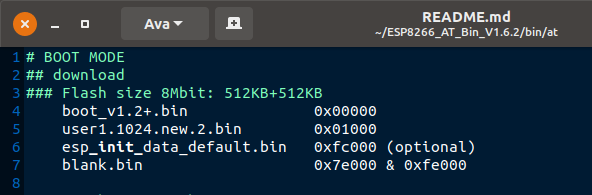
python esptool.py -p /dev/ttyUSB1 -b 115200 write_flash 0x0000 ../ESP8266_AT_Bin_V1.6.2/bin/boot_v1.7.bin 0x01000 ../ESP8266_AT_Bin_V1.6.2/bin/at/512+512/user1.1024.new.2.bin 0xfc000 ../ESP8266_AT_Bin_V1.6.2/bin/esp_init_data_default_v08.bin 0x7e000 ../ESP8266_AT_Bin_V1.6.2/bin/blank.bin 0xfe000 ../ESP8266_AT_Bin_V1.6.2/bin/blank.bin
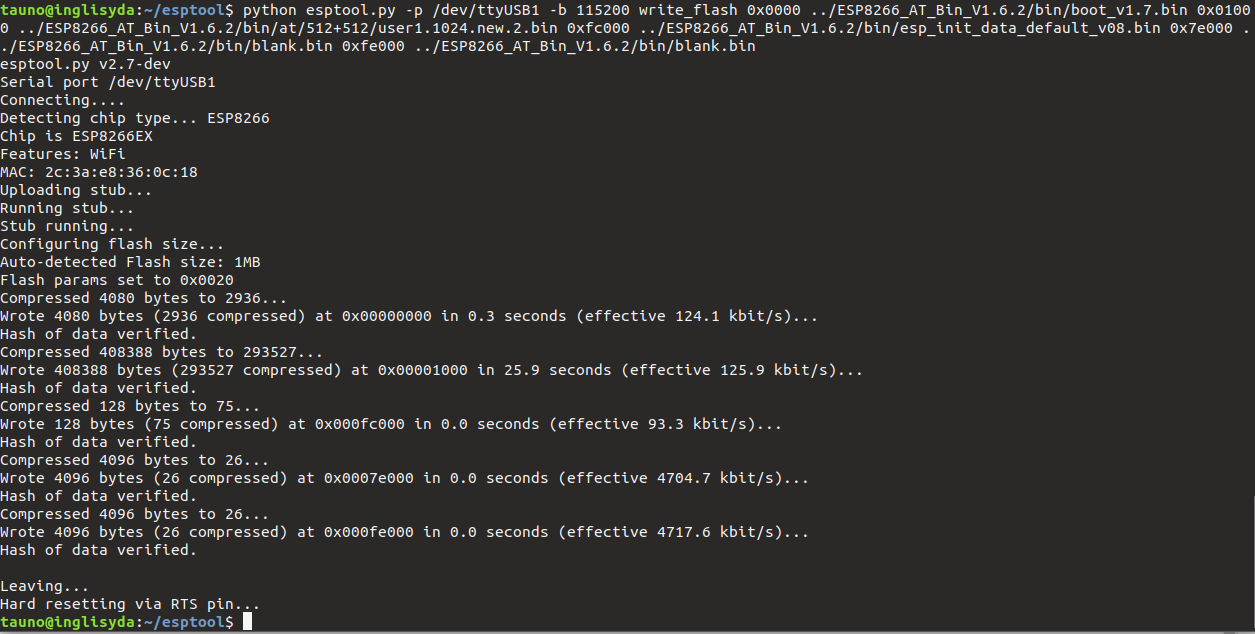
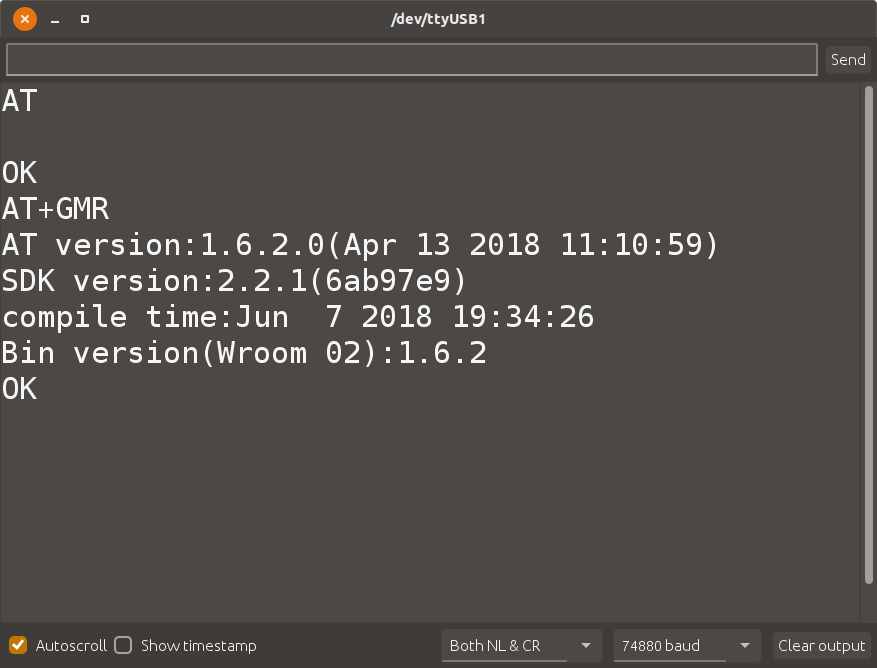
Restart ESP8266 and open Arduino IDE serial monitor and set baud rate 74880 (or 115200) and line ending should be “Both NL & CR“. Send command AT+GMR
Some AT commands
| AT | Test AT startup |
| AT+GMR | View version info |
| AT+RST | Restart module |
Wifi Functions
| AT+CWMODE=3 | Change the working mode to 3. 1 – Station mode, wifi client. 2 – AP (Access Point) mode, wifi server. 3 – AP +Station mode |
| AT+CWMODE? | Retorns current wifi mode |
| AT+CWJAP=”you ssid”,”password” | Join wifi router spot |
| AT+CWJAP? | info |
| AT+CWLAP | List allavailable Access Points. +CWLAP:<ecn>,<ssid>,<rssi>,<mac>; ECN: 0 – open, 1 – wep, 2 – wpa_psk, 3 – wpa2_psk, 4 – wpa_wpa2_psk, RSSI: signal strength |
| AT+CWQAP | Disconnect from Access Point |
| AT+CWSAP=”ssid”,”pwd”,chl,ecn | Set configurarion of softAP mode ECN: 0 – open 1 – wep 2 – wpa_psk 3 – wpa2_psk 4 – wpa_wpa2_psk PWD: max 64 bytes |
| AT+XWLIF | Get ip of stations wich are connected to esp8266 softAP. |
| AT+CWDHCP=mode,en | Enable/Disable DHCP 1 – station mode 2 – AP mode 3 – AP + station mode 0 – enable DHCP, 1 – disable |
| AT+CIPSTAMAC=”mac” | Set mac address of esp8266 station |
| AT+CIPAPMAC=”mac” | Set mac address of esp8266 softAP |
| AT+CIPSTA=”ip” | Set ip sddress of ESP8266 station |
| AT+CIPAP=”ip” | Set ip sddress of ESP8266 softAP |
TCP/IP
| AT+CIPSTATUS | Get information about connection +CIPSTATUS:id,type,addr,port,tetype stat: 2 – got ip 3 – connected 4 – disconnected type: tcp or udp tetype: 0 – esp8266 as a client, 1 – as a server |
Links:

Well done, thanks a lot.