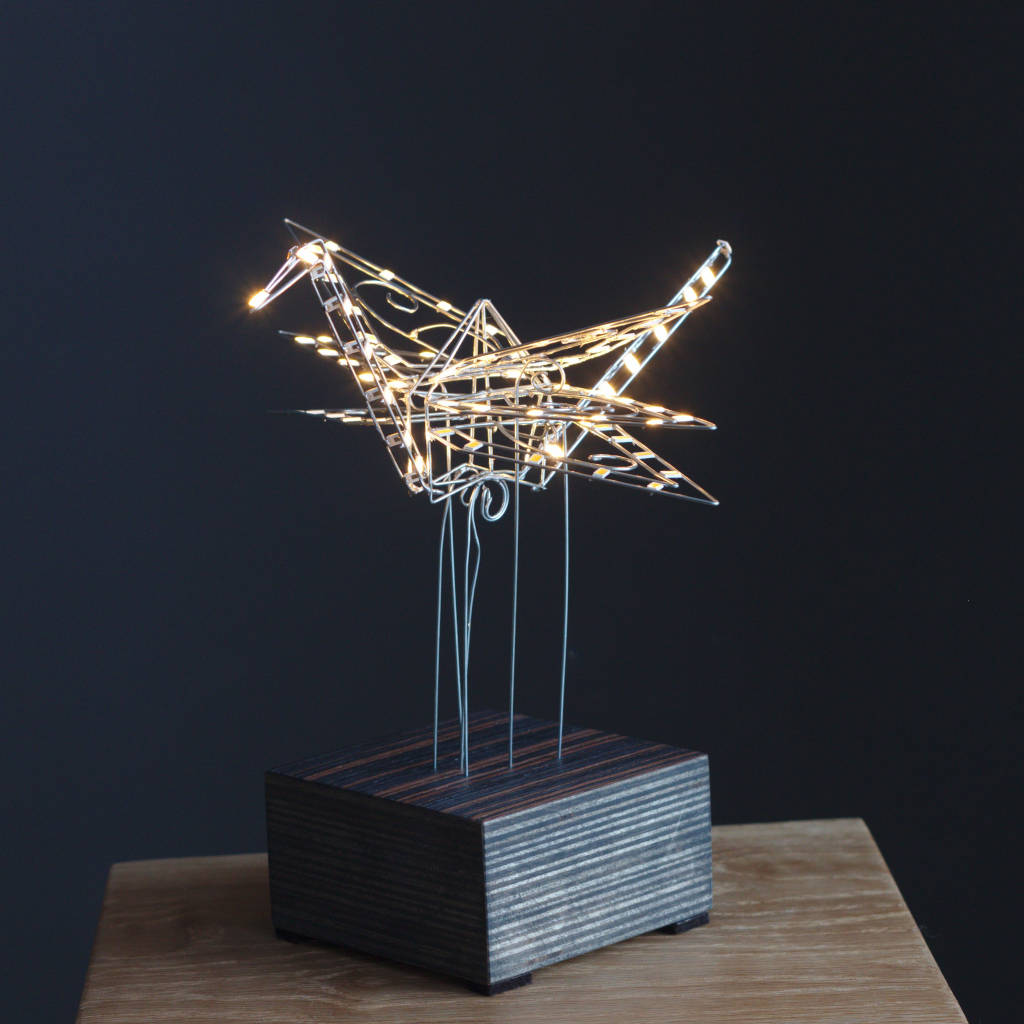
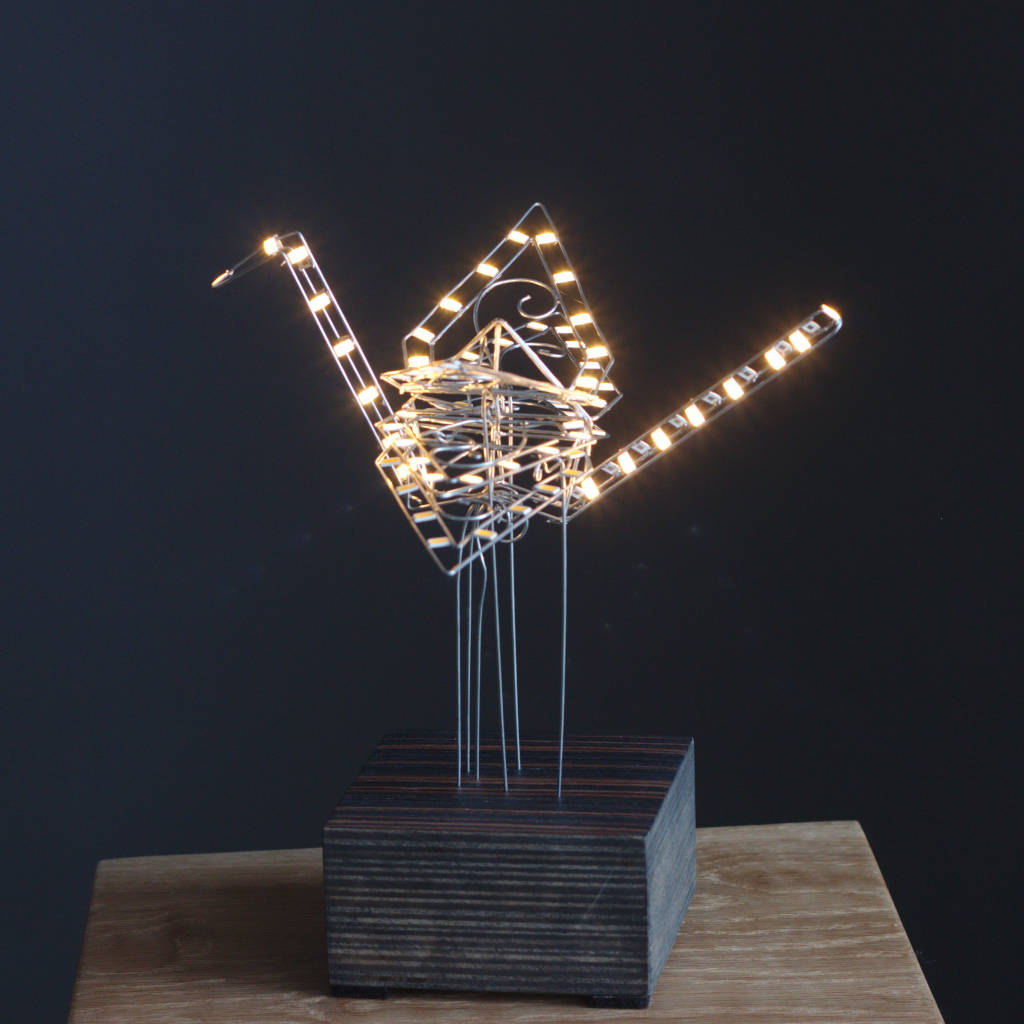
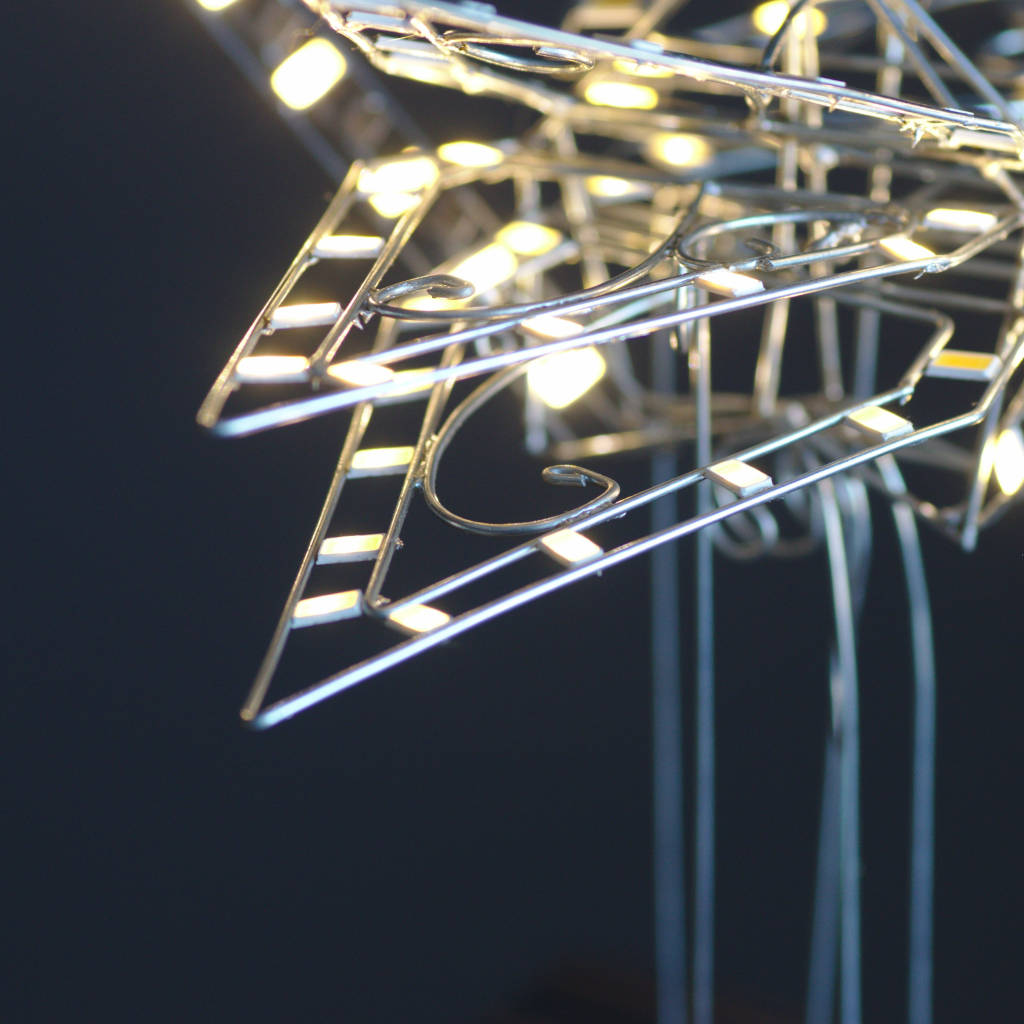
I had a bunch of smd LEDs and no idea what to do with them. But then, when I had watched all these events in Hong Kong. And when I had seen how they make this paper cranes I decided to make my own version.
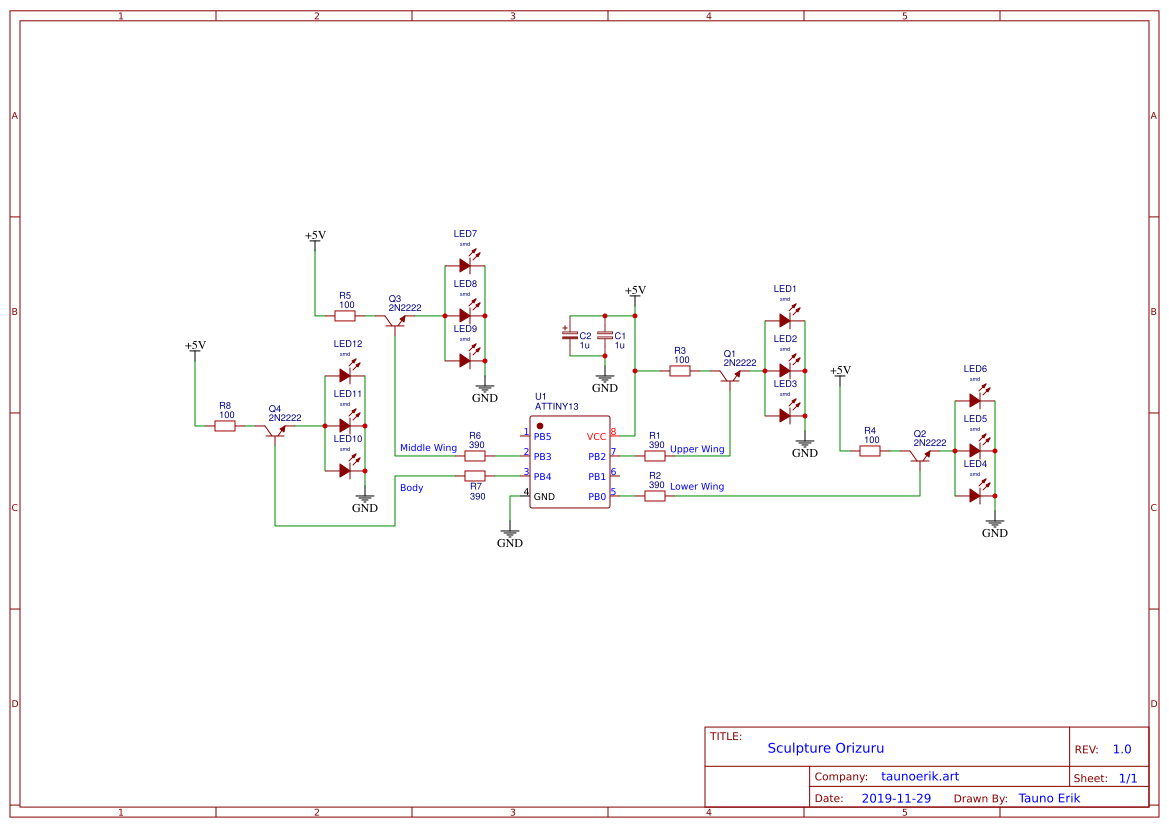
It use ATtiny13 AVR microcontroller and software PWM to slowly fade wings on and off.
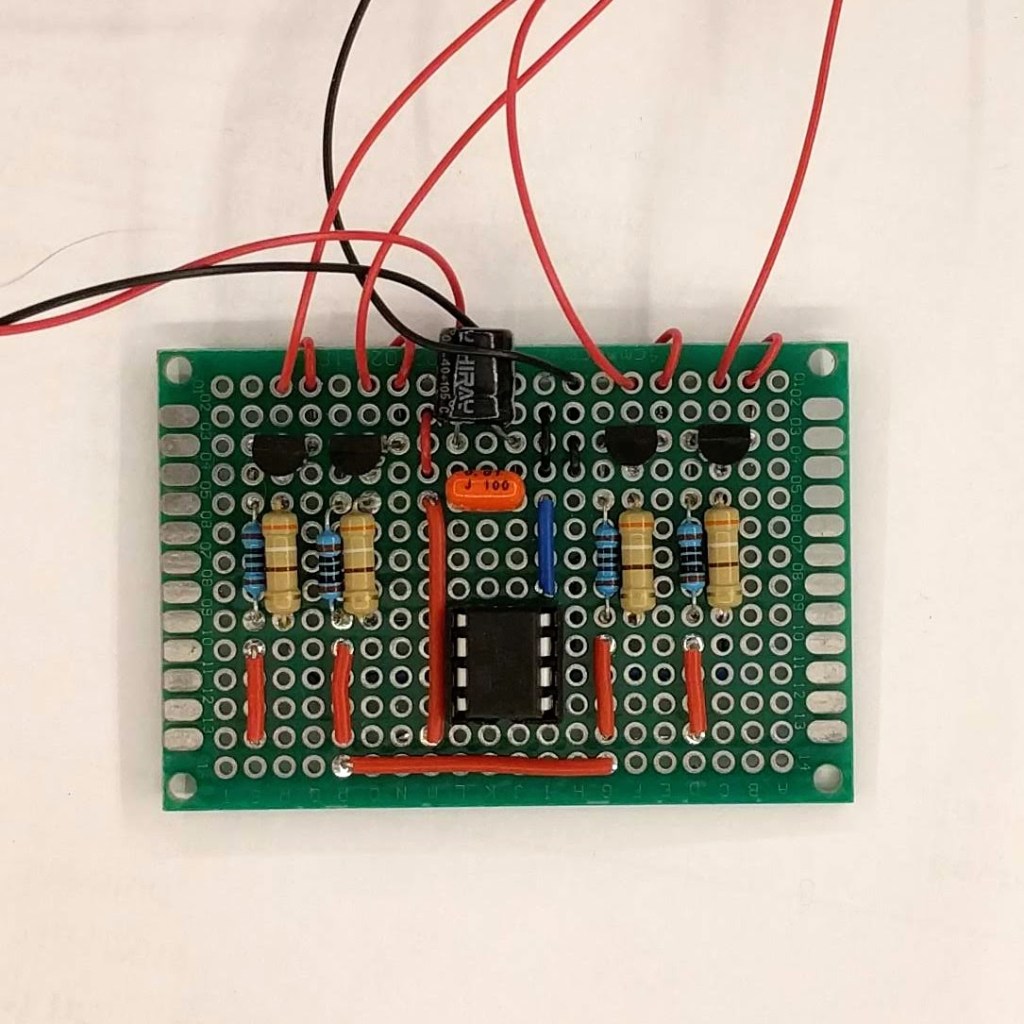
First i made paper crane and the rest is copy-paste basic forms. The basic shapes are actually simple and flat. The most difficult part is soldering SMD components.
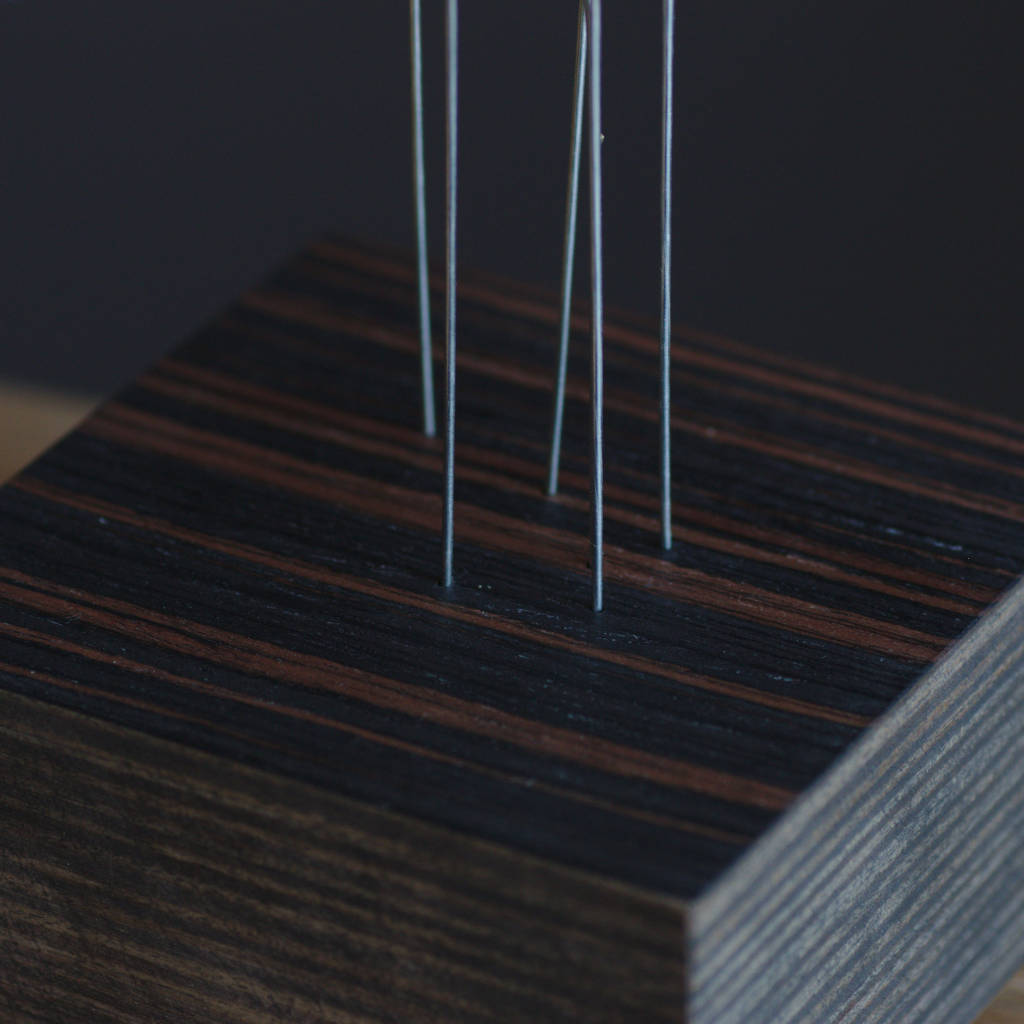
All electronics and batterys (4 x AA) are in the bottom wooden box.


Schematic
Code
I used Arduino IDE to program ATtiny13.
/**
 *
 * Hardware  ATtiny13
 * Software  Arduino IDE 1.8.10, Arduino as ISP, MicroCore
 * Clock     9.6Mhz
 *
 * Author    Tauno Erik
 * Date      29.11.2019
 *
 *
 */

 /*                        ATtiny13 pins
  *
  * Reset-ADC0-5/A0-PCINT5-PB5-| U |-VCC
  *  CLKI-ADC3-3/A3-PCINT3-PB3-|   |-PB2-PCINT2-2/A1-SCK-ADC1
  *       ADC2-4/A2-PCINT4-PB4-|   |-PB1-PCINT1-1-MISO-OC0B-INT0
  *                        GND-|___|-PB0-PCINT0-0-MOSI-OC0A
  */

//#define F_CPU 9.6E6L

#include <avr/io.h>
#include <util/delay.h>

#define WING_UPPER    PB2
#define WING_MIDDLE   PB3
#define WING_LOWER    PB0
#define BODY          PB4

#define FADE_TIME     1024
#define PAUSE         10

void set_pin_high(byte pin) {
  PORTB |= (1 << pin); // or PORTB |= _BV(pin);
}

void set_pin_low(byte pin) {
  PORTB &= ~(1 << pin); // or PORTB &= ~_BV(pin);
}


void fade_in(int ftime, byte pin) {
    unsigned int d_max = ftime;

    for (int i = 1; i < ftime; i++) {
        set_pin_high(pin);
        _delay_loop_2(i);

        set_pin_low(pin);
        _delay_loop_2(d_max - i); // 1
    }

    set_pin_high(pin);
}


void fade_out(int ftime, byte pin) {
    unsigned int d_max = ftime;

    for (int i = 1; i < ftime; i++) {
      set_pin_low(pin);
      _delay_loop_2(i);

      set_pin_high(pin);
      _delay_loop_2(d_max - i);  // 1
    }

    set_pin_low(pin);
}


void fade_out_in(int ftime, byte pin_out, byte pin_in) {
    unsigned int d_max = ftime;

    for (int i = 1; i < ftime; i++) {
        // out:on in:off
        set_pin_high(pin_out);
        set_pin_low(pin_in);
        _delay_loop_2(d_max - i);

        // out:off  in:on
        set_pin_low(pin_out);
        set_pin_high(pin_in);
        _delay_loop_2(i);
    }

    set_pin_low(pin_out);
}


int main(void)
{
    /* setup */
        // set pins as OUTPUT
        DDRB |= _BV(WING_UPPER);     // sama mis DDRB |= (1 << PB2);
        DDRB |= _BV(WING_MIDDLE);
        DDRB |= _BV(WING_LOWER);
        DDRB |= _BV(BODY);

        // set pin to HIGH
        PORTB |= _BV(WING_UPPER);
        PORTB |= _BV(WING_MIDDLE);
        PORTB |= _BV(WING_LOWER); */

        /* Fade in Body */
        delay(500);
        fade_in(FADE_TIME, BODY);

        byte first_time = 1;
     /* loop */
        while (1) {
            if(first_time){
              fade_in(FADE_TIME, WING_UPPER);
              _delay_loop_2(PAUSE);
              first_time = 0;
            } else {
              fade_out_in(FADE_TIME, WING_UPPER, WING_MIDDLE);
              _delay_loop_2(PAUSE);
              fade_out_in(FADE_TIME, WING_MIDDLE, WING_LOWER);
              _delay_loop_2(PAUSE);
              fade_out_in(FADE_TIME, WING_LOWER, WING_MIDDLE);
              _delay_loop_2(PAUSE);
              fade_out_in(FADE_TIME, WING_MIDDLE, WING_UPPER);
              _delay_loop_2(PAUSE);
            }
        }
        return 0;
}
Links
- Programming ATtiny13 with Arduino Uno
- Programming ATtiny85 with Arduino Uno
- Łukasz Podkalicki 100+ Projects on ATtiny13

wow amazing . i didn’t know such circuits also needs coding
It does not need any code when it is simple light. But i was trying to make it more interesting. Ability to turn on or off different parts or change brightness. I want to make it more a alive.
hmm i can see how your code sync with the lights. code give little life to the bird it seems.