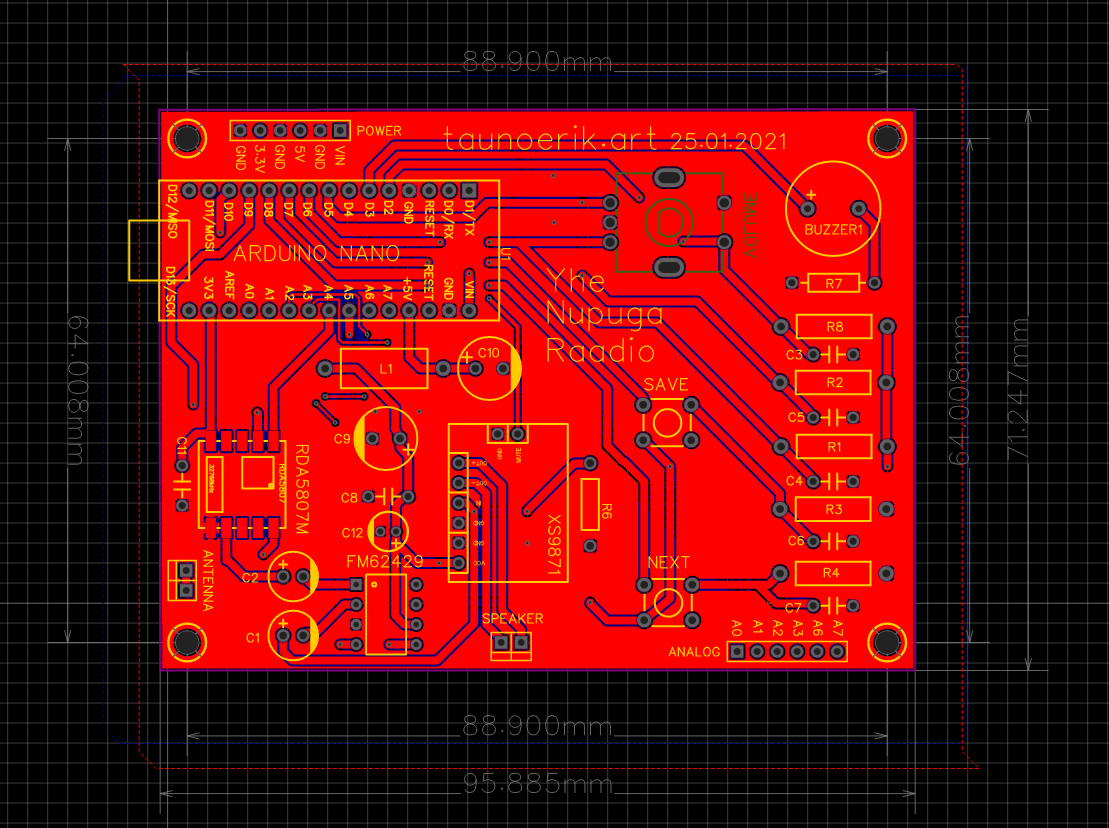
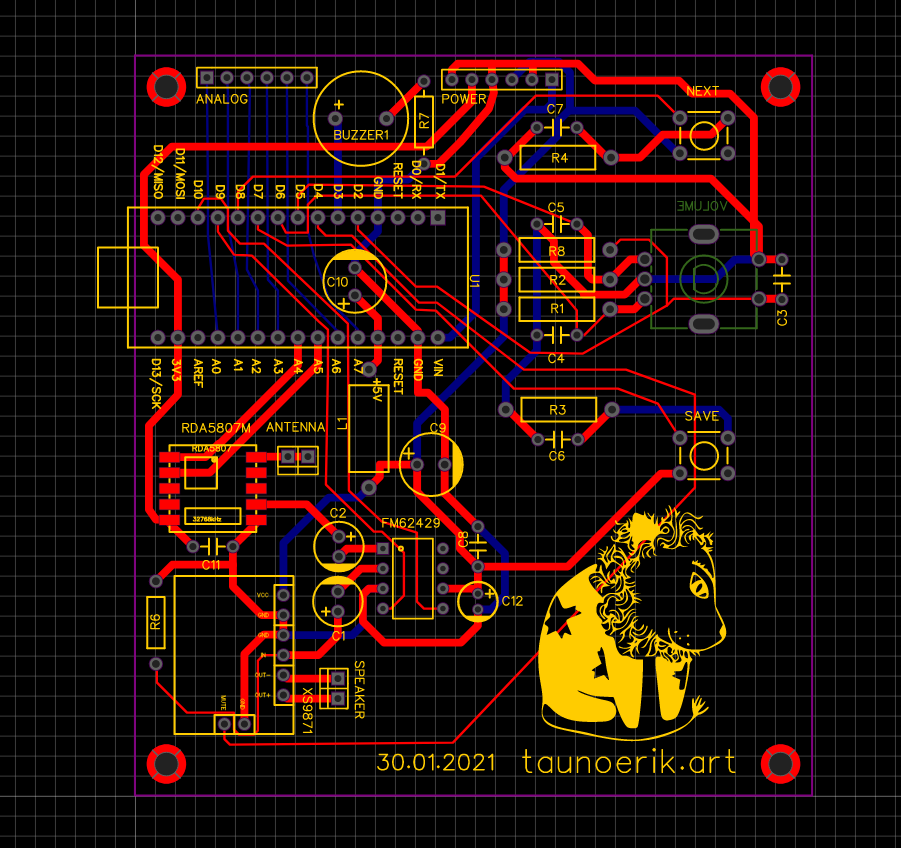
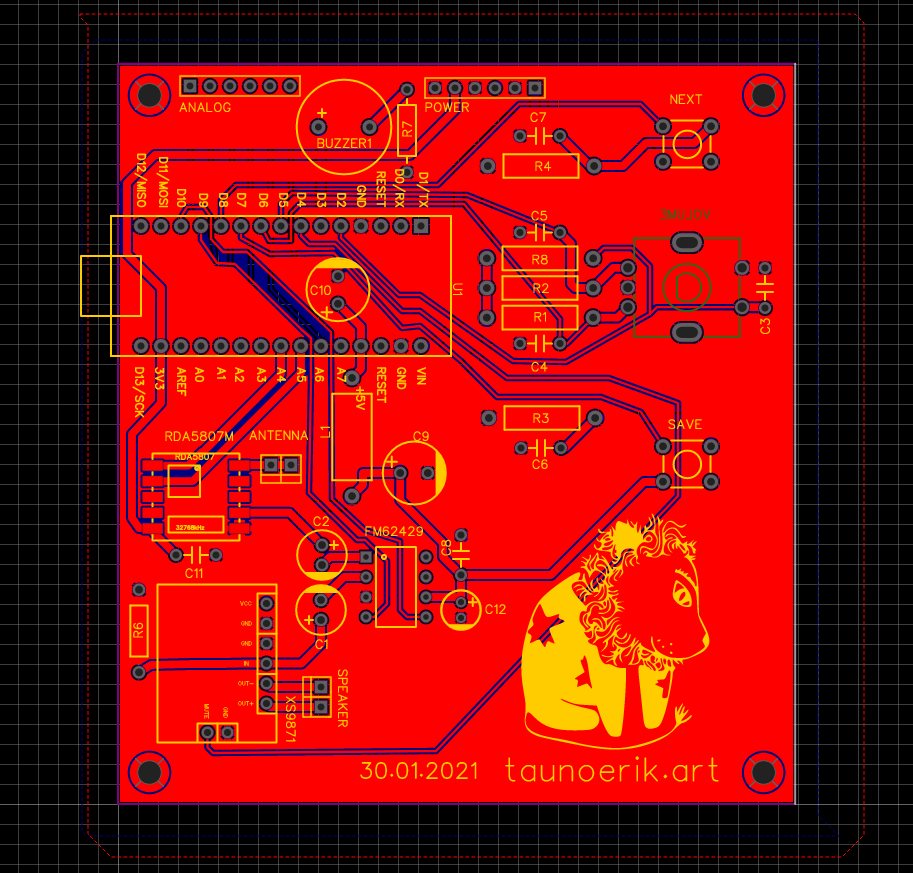
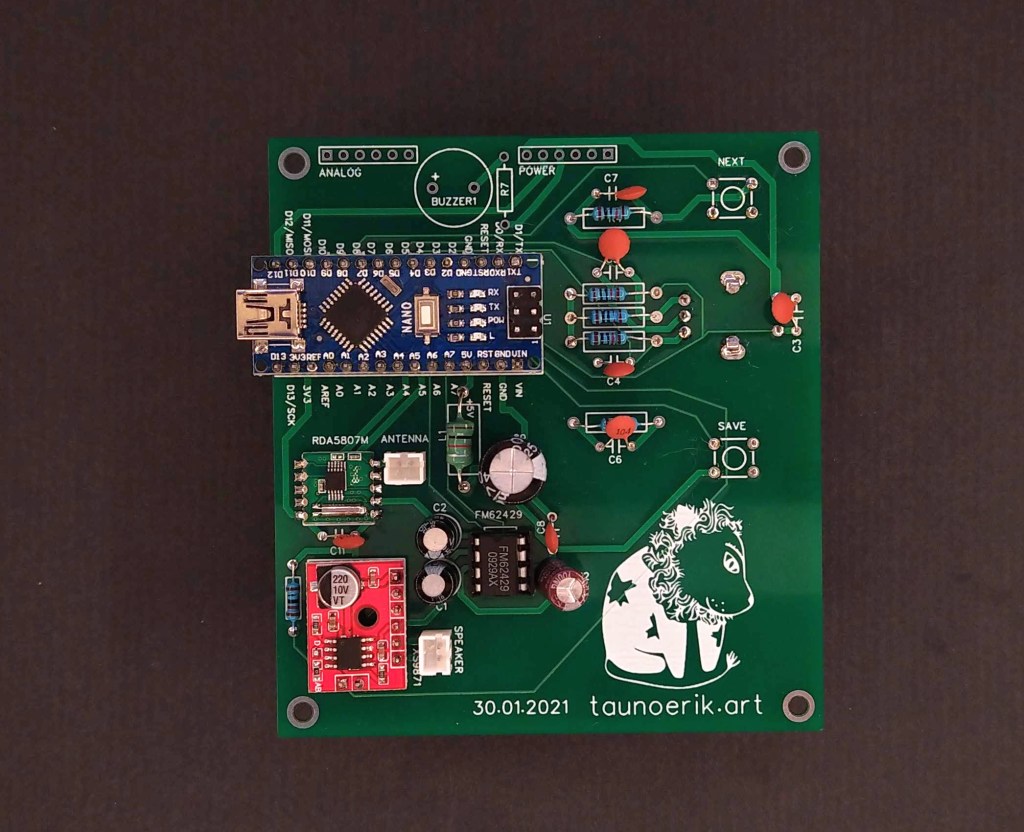
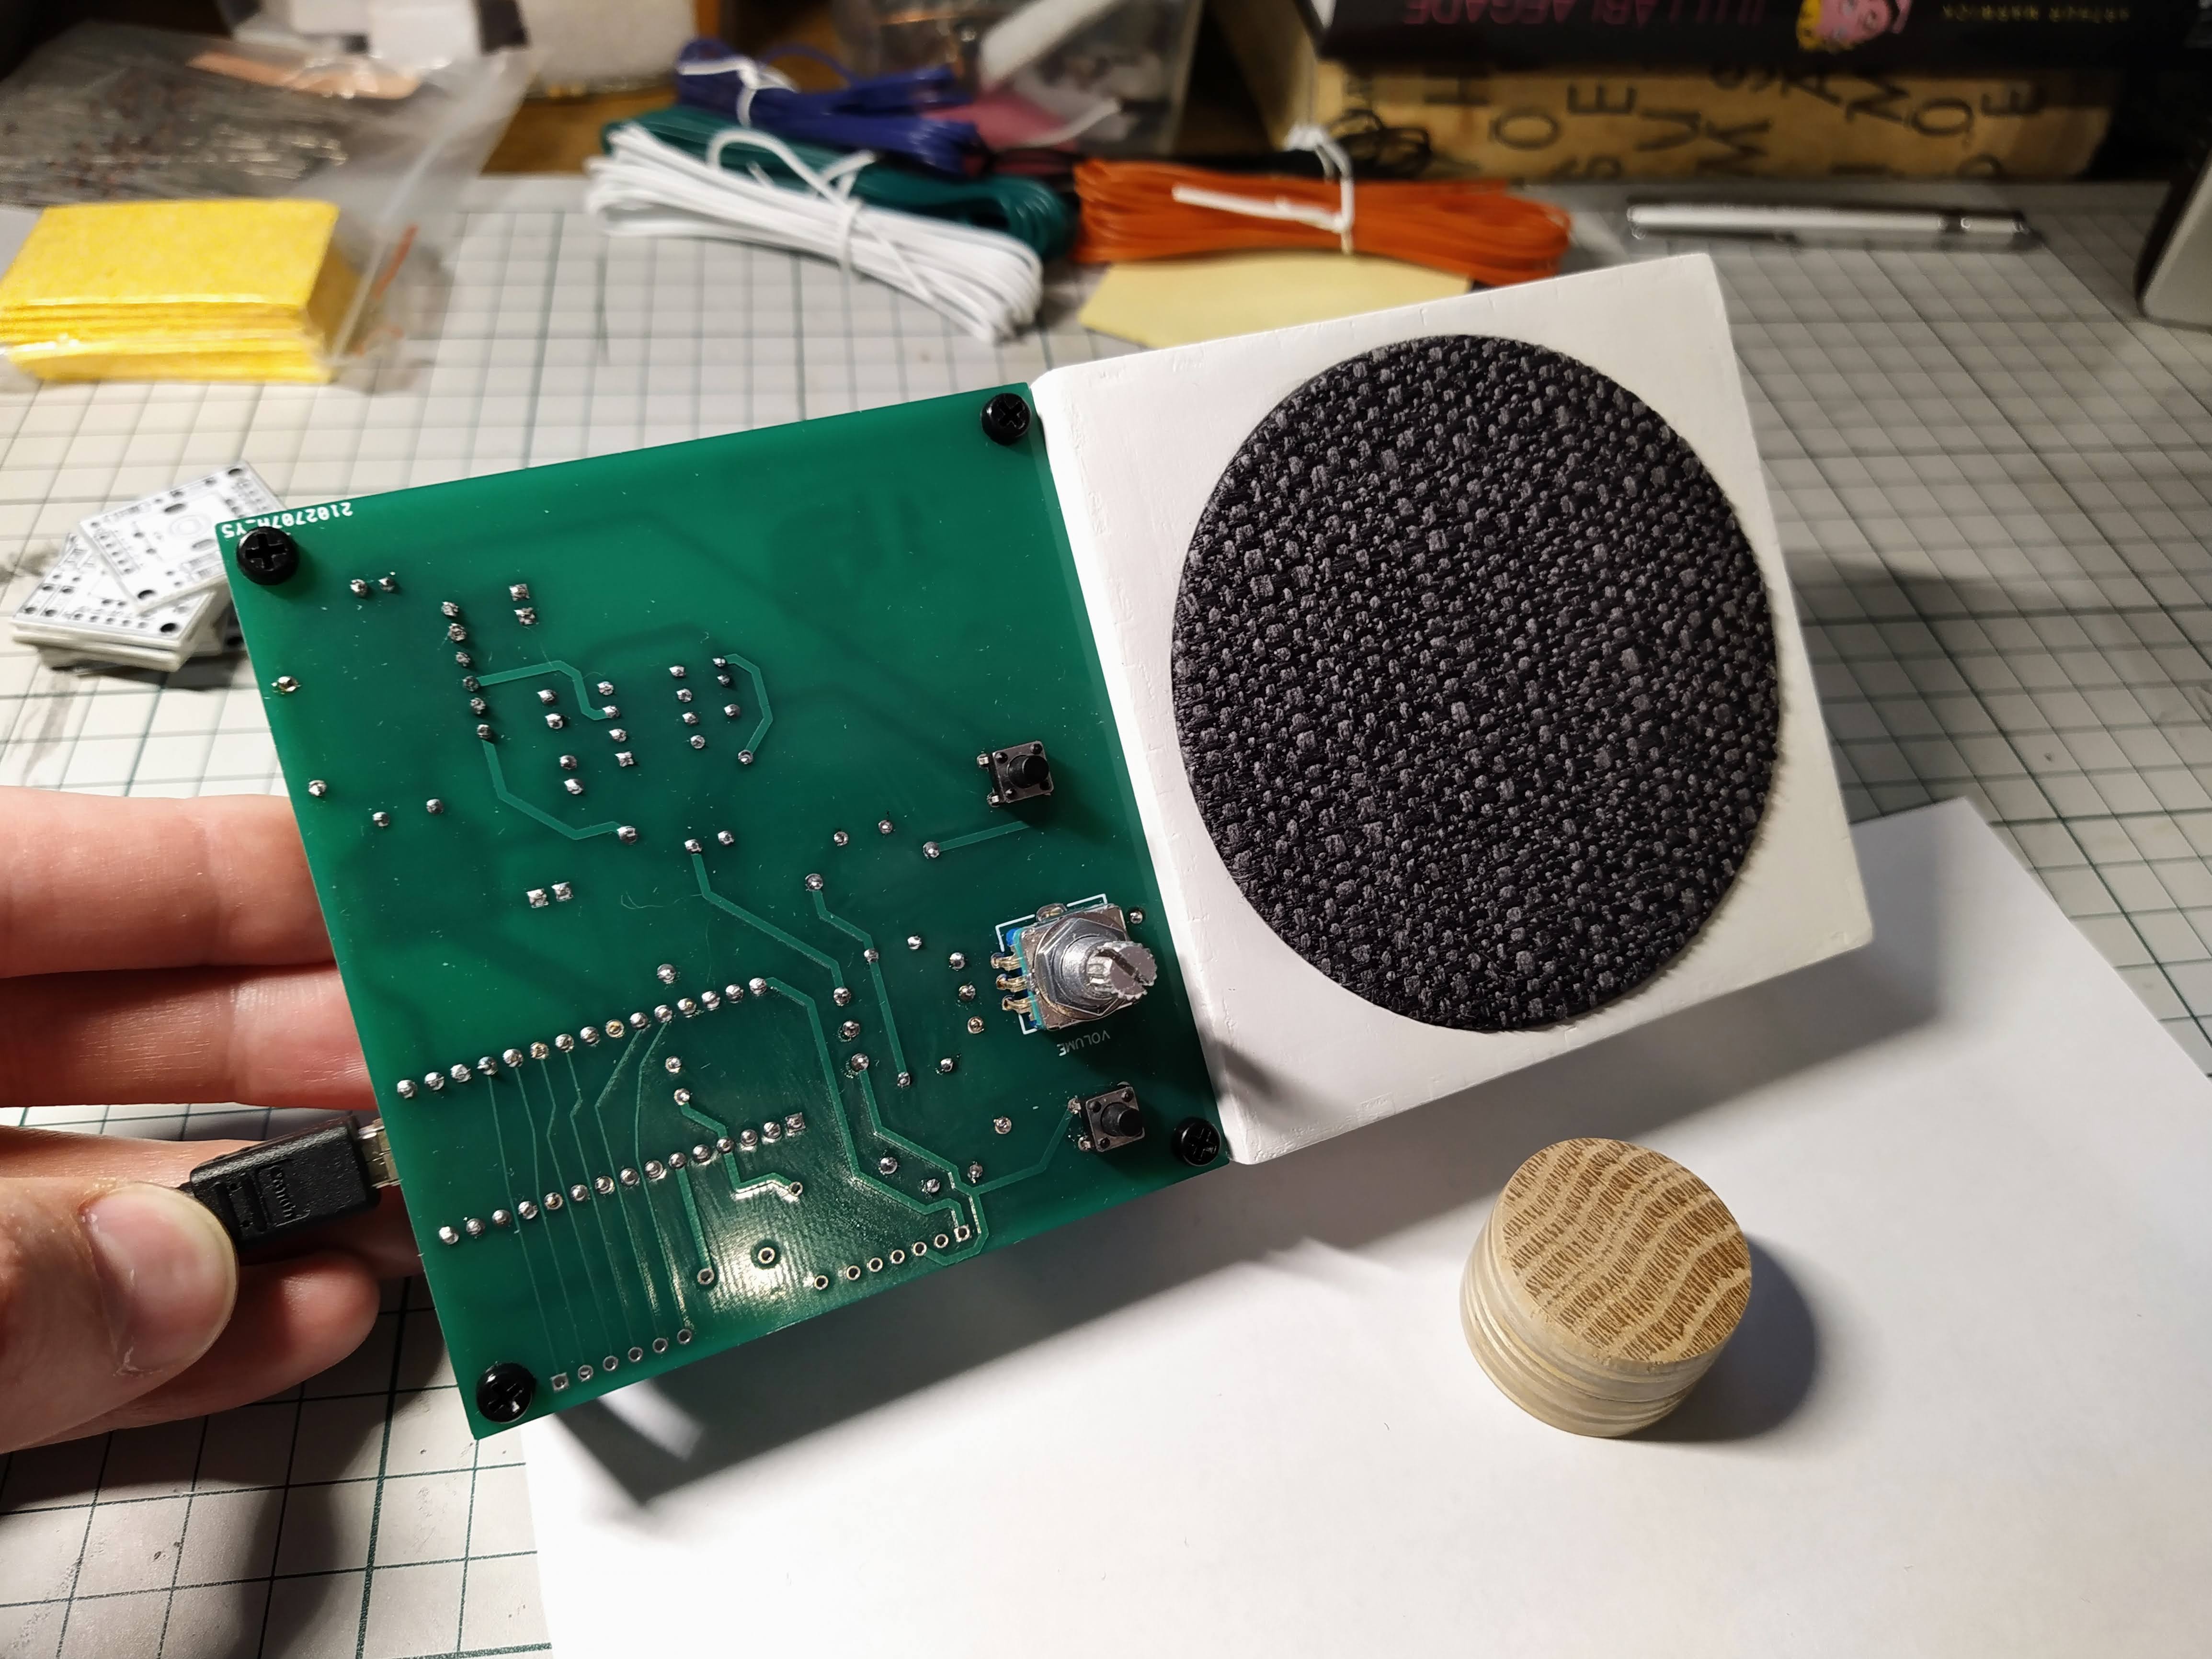
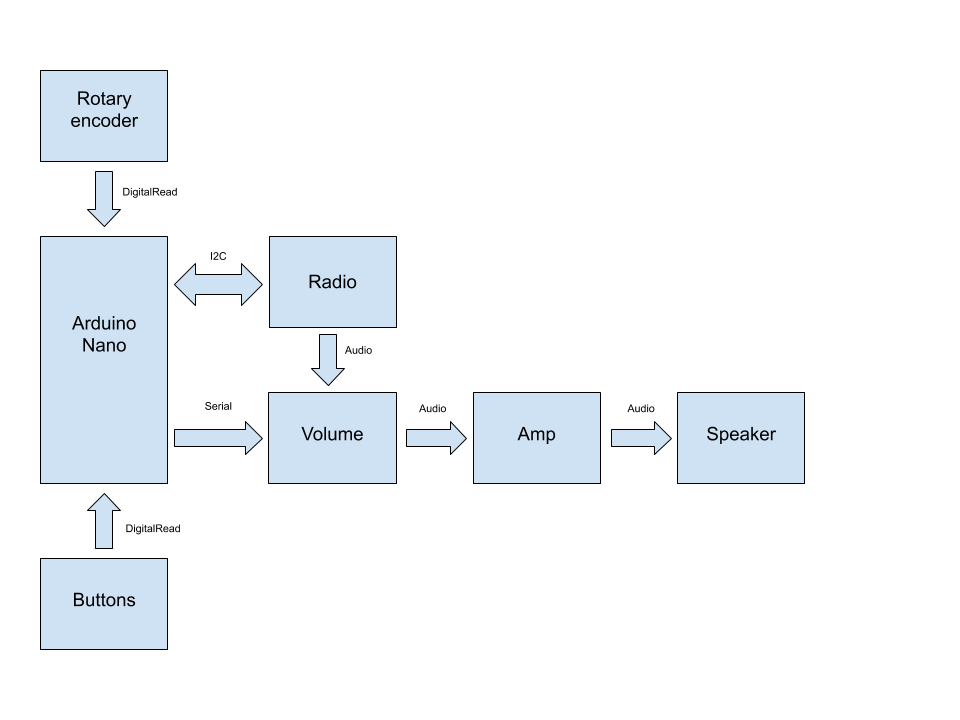
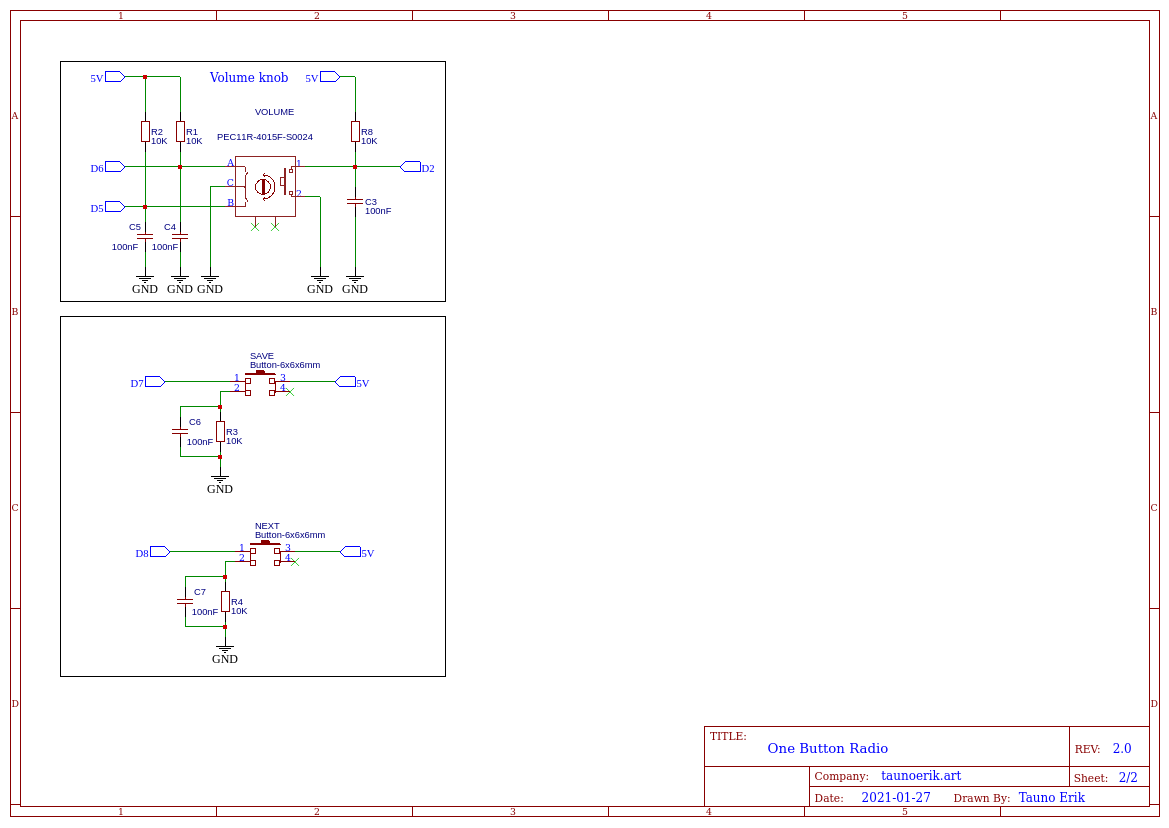
This is my simple one-button radio. One button to turn it on and change the volume. There are actually two buttons more: first to select a new channel and second one to save it to memory.
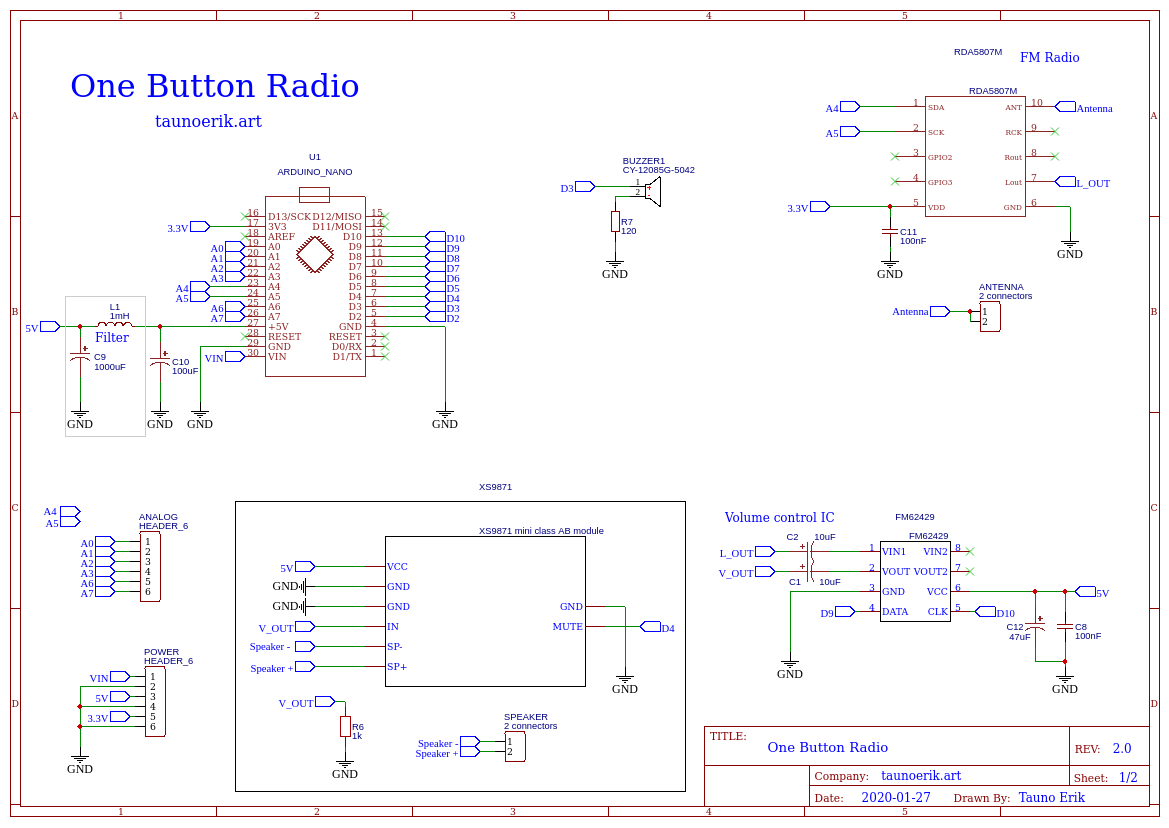
It was a project that taught me how to draw PCBs, what are Gerber files and so on. I designed 4 different layouts, orders two. The first one had some noise problems. So I added some filters and ordered the second one.
It works and I am happy with it mostly. I do not have any education in electronics, so forgive me if it does not meet professional standards.
It is now my second stop motion animation. It took about a week to do. It could be better if I put more time into it.
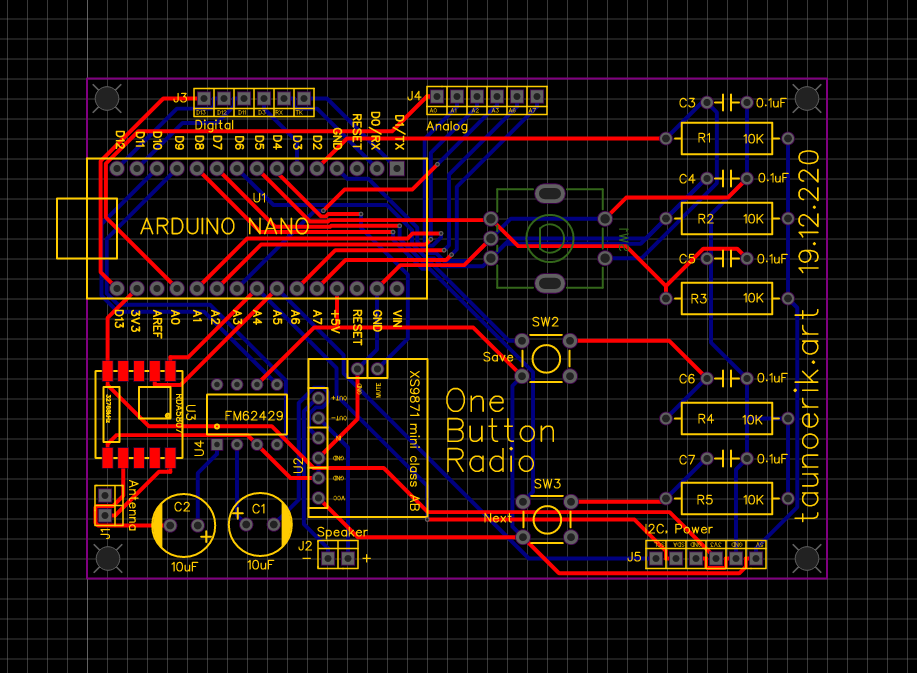
Schematics
It uses Arduino Nano as the main control unit.

That’s really cool—the radio *and* the stop motion! Love the scene with the snow(?) floating at the end.
I used to make small electronic kits when I was young, and I really enjoyed it. I’m pretty sure I made a simple radio, but not the PCB from scratch. 🙂
You’re very creative, Tauno. Keep. It up.
Yes it is the snow.